Traditional Rich Tiered Fruit Cake | Your perfect choice!
$5
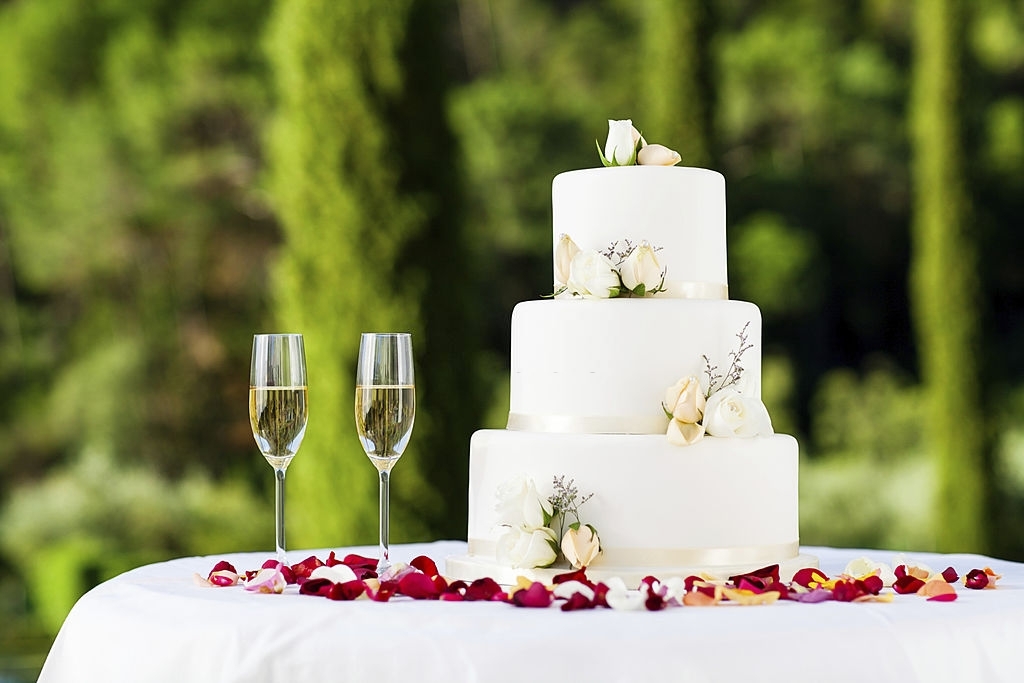
Fruit cakes are classically made with dried or candied fruits, nuts, and other spices and sometimes soaked in brandy. They are mostly served at weddings, birthdays, or other festive occasions.
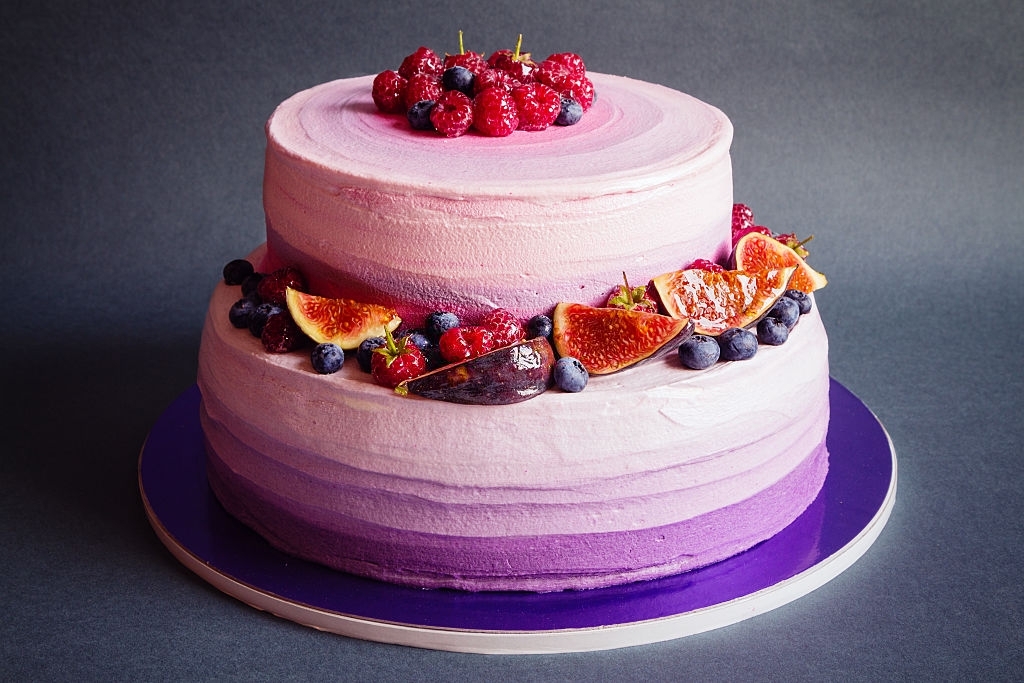
Tiered fruit cakes are simply gorgeous, look elegant and give that wow factor to the cake. They are unique and fun to make. Tiered fruit cakes get much more attention and appreciation due to their heightened presence than the one layered cakes. Also, obviously, another reason for making tiered cakes is to serve massive gatherings.
How to Make a Perfect Tiered Fruit Cake
Supporting a multi-tiered cake is crucial. If not adequately supported, the upper layers might sink in the lower layers ruining all the hard work and beauty.
Light up your occasion by making fruit cake by using our best-tiered fruit cake recipe. The best thing about fruit cakes is that they can be made a few days in advance and serve when needed.
Tiered Fruit Cake Recipe
- Preparation time: 30 minutes.
- Cooking/ baking: 2 hours and 15 minutes.
- It also needs cooling time.
- Serves 24-25 persons.
- Skill: Advance baking skills required.
Nutrition per servings: (24-25 servings per cake)
- Total calories per serving: 157-kilo calories
- Saturated fats: 3 grams
- Total fats: 7 grams
- Fiber: 1 gram
- Carbohydrates: 24 grams
- Sugars: 18 grams
- Protein: 2 grams
- Salt: low in salt: 0.06 gram
Ingredients:
For a 15cm round or 12cm square cake:
- 100 grams of sultanas
- 225 grams of currants
- 100 grams of raisins
- 25 grams of mixed peel
- 50 grams of glace cherries
- 175 grams of plain white flour
- Two tablespoons of Brandy
- ¼ teaspoon of powdered cinnamon
- ¼ teaspoon of mixed zest
- Three large eggs are beaten
- 150 grams of white confectioners' sugar
- 40 grams of chopped almonds
- 150 grams of unsalted butter
- ½ Lemon peel/zest
Method and Directions
- Start by preheating the oven to 150°Centigrade. (Fan must be at 130°Centigrade fan, 300° in Fahrenheit, and gas mark number 2).
- Take the baking tray, grease it, and place two parchments of baking paper. Also, tie a double layer of brown papers around the tin. Place the tray on a baking sheet that has also been lined with a double layer of brown paper.
- Now take a medium-sized bowl. Put in all the sultanas, mixed peel, glace cherries, and raisins in it. Give them a stir. Add two tablespoons of brandy and leave them overnight to soak properly. Cover the bowl with cling film.
- Finely sift the flour, cinnamon powder, and mixed spice in another bowl. Add chopped almonds after sifting.
- Now, put lemon zest, sugar, and unsalted butter in a mixing bowl. Beat alongside the help of a blender mixer until they become fluffy and light. It is better to use an electric mixer than a handheld mixer because it gives good results, especially for large quantities.
- Now, slowly start infusing the beaten eggs. Add a tablespoon of flour if lumps began to form.
- Take the spic and flour mix, folded before, and combine well. Add the fruits and liquid (if any) that was left to be soaked. Mix well for even distribution.
- Start placing the mixture in the baking tray and spread uniformly. Tap the baking tin several times on the counter to remove air bubbles. With the help of a spatula, level up the mixture's surface. Make a small dip in the center.
- Place it to bake in the center of the oven. The smallest layer/tier will take two to two and a half hours to bake. The middle tire will take around four hours, and the largest piece will take about six hours. Check by inserting a skewer in pieces. If it comes out clean, the tiers are ready. Suppose it isn't a clean place, back the cake for further baking. When done, remove from heat and place to cool.
- When the cake is finally cooled, carefully take it out from the tin but do not take off the baking paper. Pock holes in the top of the cakes and pour leftover brandy. Cover properly with foil and leave for a while. Unwrap after a while and pour more brandy. Wrap again until it's time to decorate.
- Marzipan it by brushing the sides and top with a smoothly textured and lightly warmed apricot jam.
- Slightly dust the counter and the rolling pin with icing sugar. Start rolling the marzipan; turn it 90 degrees after each move to evenly thicken that. Keep it thick, equal to a £1 coin.
- With the help of a moving pin, raise the marzipan and place it carefully over the cake.
Flatten the marzipan over the cake by using your hands. Ensure you leave no air pockets. Cut back the extra marzipan hanging from the cake utilizing a little knife. - Cover your hands lightly with icing sugar and tenderly run over the cake to smooth out any air bubbles, bumps, and lumps. Let it rest at a specific room temperature for 1 to 2 days until ready for icing.
- With sugar, icing covers the cake board. Brush it with a little amount of water to firmly place the icing on the cake board.
- With sifted confectioner's sugar, lightly dust the counter and rolling pin. It will take around 250 grams of icing sugar paste to make a layer that is 3milli meter thick and big enough to envelop the cake board. A larger board will require a larger quantity.
- With the help of the rolling pin, pick up the icing and lay it on the cake board. Using your hands, flatten it on the board and remove air bubbles. With the help of a cake smoother or knife, cut the extra icing around the rim of the board. Leave it to get dry for one to two days, if possible. When the icing dries up, wrap up a ribbon around its base and fix it by inserting pins.
- To make levels/tiers on the fruit tiered cake, cut and place a template of a similar size as the subsequent layer and place it at the second tier's position. Fix corners with a needle. Insert a plastic rod into the cake. Mark the rod with a pencil showing the point from where it came out of the cake. Take out of the dowels and cut them around 1-2mili meter over the imprint, and stick them in again.
- Layout some royal icing onto the focal point of the base level to make sure the above level is rightly placed. Cautiously place the second level onto the first.
- Blend some icing to match up with the shade of the cake icing. Daintily line piping along the base of each level. While it is still wet, with a finger, flatten the icing. Fill if there are any holes between the two layers. A ribbon strip can also be placed here to conceal any unevenness that may show up.
- For decorations, make the round shapes with sugar paste icing. The end of the piping nozzle or little cutters can be used for this purpose. Place a small amount of icing with the help of a piping bag on top of the fondant to adhere to the cake's shape.
- Place a plain nozzle in the piping bag. Fill and twist the bag and hold it in your hand. Make piped dots by squeezing the icing. The icing ought to be even, delicate, soft, and firm. Make dots at all the desired places of all the desired shapes and designs. Finish squeezing and draw nozzle sharply up when done. If that leaves a little peak on the dot, carefully flatten it up with a knife spot or brush.
Tips and Recipe Note
- The cake will have a nice, leveled top and will cut better if strong white flour is used in place of plain flour.
- In case you're shipping the cakes to another venue, it's ideal for shipping them separately and assembling and decorating the cake at the destination.
- The cakes can be marzipan to one month in advance. Then ice them three days before the finalized time.
- There are various types of dowels that are utilized to help a cake stand. They can be of plastic, wood, sticks, or straws. No matter what dowel you use to support the cake, make sure it is food-safe.